
Reviewed · DMZ DAY TOURS
Seoul DMZ Tour with 3rd Tunnel and Red Suspension Bridge
A border you can’t ignore. This Seoul DMZ day puts you on the Korean War front line, with stops like Imjingak and the Third Tunnel plus big-sky views at Dora Observatory.
What I like most is that the day feels structured but not rushed, and you get both the human story and the physical geography in one run. I also love the hands-on realism of the tunnel walk and how the suspension bridge adds a quieter, more emotional note.
The main drawback is that this isn’t a stroll. The Third Tunnel is cramped and steep at points, and the climb to the suspension bridge can feel like a workout.
In This Review
- Key Highlights at a Glance
- How the Day Flows From Myeong-dong to the DMZ
- Stop 1: Imjingak Pyeonghoa-Nuri Park and the Unification Message
- Stop 2: Mangbaedan and New Year’s Day Memories
- Stop 3: The Third Tunnel Walk That Actually Changes Your Posture
- Stop 4: Dora Observatory and the Northward View Game
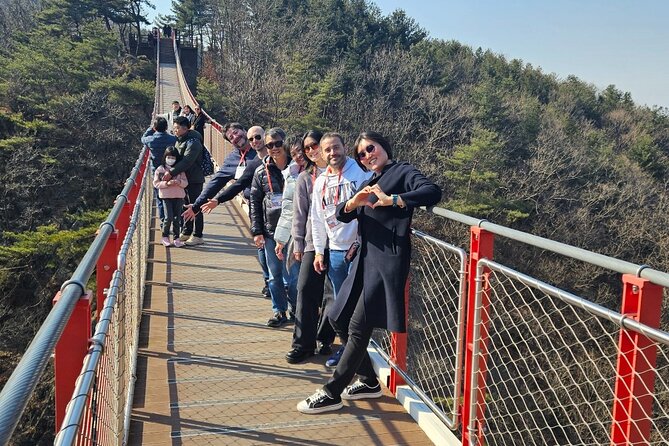
- Stop 5: Gamaksan Chulleong Bridge and the Hill That Comes With It
- Price and Value: Why $45 Can Actually Be a Good Deal
- Guides Matter: What Makes This Tour Feel Smooth
- Practical Tips So You Don’t Feel Miserable
- Should You Book This DMZ Tour?
- FAQ
- Is Joint Security Area (JSA) included?
- How long is the DMZ tour?
- What’s included in the price?
- Where do I meet the group?
- What documents and items should I bring?
- Can I cancel for a full refund?
Key Highlights at a Glance
- Guides make the day click: stories stay clear and respectful, and even the bus ride helps you understand what you’re seeing.
- The Third Tunnel walk is the star: tight passages, steep grades, and low ceilings create a real sense of scale.
- Dora Observatory is view-time dependent: your skyline look north depends on weather clarity.
- Imjingak ties history to memory: monuments and the North Korea Center help frame what the DMZ means today.
- Gamaksan suspension bridge adds emotion: it’s short, but the hill approach and wartime context make it memorable.
- Value is strong for $45: air-conditioned transport plus admission tickets and a professional guide are included.
Other ways to reach the DMZ and the border from Seoul
- DMZ Tour: 3rd Tunnel, Option(Suspension Bridge, Boat) from Seoul★ 5.0 · 21,373 reviews
- DMZ tour south Korea from Seoul (NK experience hall, defector)★ 5.0 · 20,599 reviews
- Seoul: DMZ Tour with Optional Suspension Bridge★ 4.8 · 5,277 reviews
- Seoul: DMZ The 3rd Tunnel and Suspension Bridge Tour★ 5.0 · 4,656 reviews
How the Day Flows From Myeong-dong to the DMZ
This is an all-day setup that starts and ends back near Myeong-dong, with the meeting point at the Myeong-dong subway station. You’ll ride in an air-conditioned vehicle and use a mobile ticket. Hotel pickup isn’t included, so you’ll want to get yourself to your chosen meeting/pickup spot and go from there.
Plan for an approx. 8-hour day. It’s a lot of driving, but the schedule tries to keep momentum: short stops for the memorial sites, then the heavier legs of the day at the tunnel and the bridge. The day can run long if the DMZ area is busy or if weather affects viewing, so bring patience—and some snack backup, since meals aren’t included.
One more real-world factor: because the DMZ is military-operated, the tour may be canceled with limited notice. On top of that, the operator also notes it requires a minimum number of travelers. If you’re on a tight itinerary, consider building in flexibility.
Stop 1: Imjingak Pyeonghoa-Nuri Park and the Unification Message
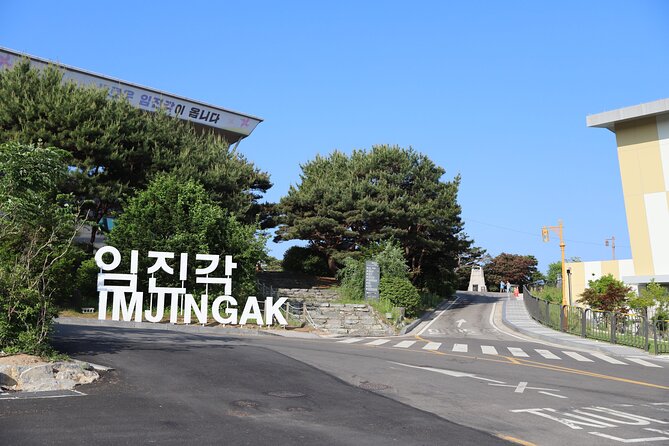
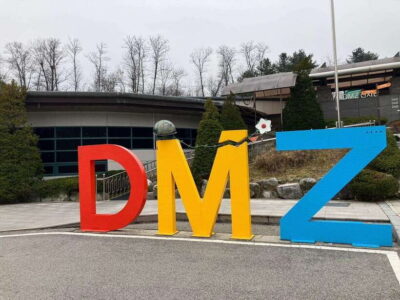
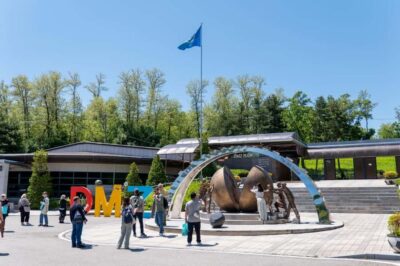
Your first stop is Imjingak Pyeonghoa-Nuri Park, a place built in 1972 with the hope that unification would one day be possible. It’s a museum-meets-memorial type of space, with a three-storied main building and surrounding monuments that are meant to hold attention rather than rush you.
You get about 30 minutes here, and admission is free. That short time is enough if you focus on the big idea: this area is designed to connect the war’s aftermath to the continued longing for reunion. You’ll also see Unification Park and the North Korea Center, which helps you understand that the DMZ isn’t only about tanks and lines—it’s about separation and lives put on hold.
This stop works well early in the day because it sets the emotional baseline before you head toward the tunnel and the viewing points. If you jump straight to the military sites first, the day can feel like sightseeing. Starting at Imjingak makes the rest hit harder.
Stop 2: Mangbaedan and New Year’s Day Memories
Next up is Mangbaedan, a memorial connected to people who left families in the north, particularly tied to New Year’s Day. You’ll spend about 15 minutes here, and admission is free.
In a day full of physical landmarks, Mangbaedan gives you a quieter kind of context. It’s short, but it matters because it frames the DMZ as a continuing human rupture, not only a past event. You don’t need a long attention span for this stop. You just need to pause, look around, and let the meaning land.
If you’re the type who likes to understand traditions and symbolism (not only dates), this is a good use of time.
Stop 3: The Third Tunnel Walk That Actually Changes Your Posture
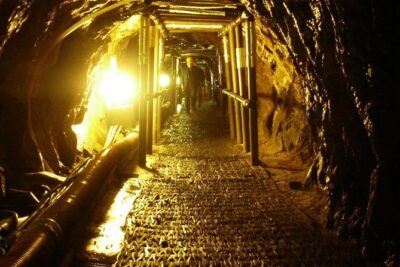
The reason most people book this tour is the Third Tunnel. It was discovered by South Korea in 1978 and stretches 1,635 meters in length. The tunnel’s footprint is small—about 2 meters wide and 2 meters high—so it’s not a comfortable walk.
It’s also located 52 km from Seoul, and you’ll have about 40 minutes at the tunnel area, with admission included. Expect more than stairs-to-stairs tourism. This is the closest thing in the day to a lived-in, practical understanding of what underground movement meant during the Korean War era.
From the experience angle, here’s what to take seriously:
- The tunnel route includes a steep descent and ascent.
- The ceiling and walking space can force you into a hunched posture for stretches.
- Low headroom is real, even with safety gear.
- Even if you’re okay with walking, the tunnel can make you feel like you’re constantly adjusting your body.
In past days with this itinerary, I’ve seen notes that the descent can feel long and angled, and the return can be tiring because you’re climbing back after you’ve used energy going down. You’ll likely be wearing safety head protection during the tunnel visit.
If you’re tall, consider that headroom can matter. One review described hitting their helmet multiple times even at 176 cm tall. The point isn’t to scare you—it’s to help you dress for reality: wear a hat/hood situation that doesn’t add bulk, keep your footing steady, and don’t treat the tunnel like a flat museum corridor.
This stop is the most physically demanding part of the itinerary, and it’s also the most “this is why it mattered” moment.
Stop 4: Dora Observatory and the Northward View Game
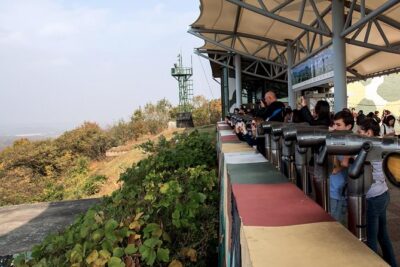
After the tunnel, you move to Dora Observatory for about 30 minutes. Admission is included here too.
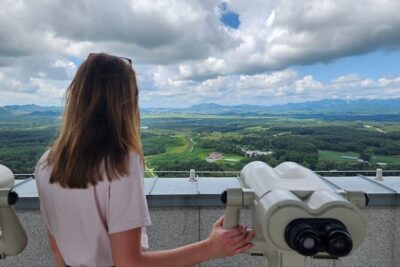
Dora is famous because you can look north (through the boundary limits set by authorities) toward places that include Gaeseong, Songaksan, a Kim Il-Sung statue, and the Cooperation Farm (Geumamgol). You’re basically standing at a controlled viewpoint where the DMZ becomes visible as more than maps.
A big note: the quality of what you can see depends on weather and clarity. On a clear day, the view can feel surprisingly crisp. On hazy days, details can fade. That’s not something you can control, so I’d go in with flexible expectations and focus on the shape of the landscape and the named sites you’re looking at.
This is also where your guide’s framing really helps. The best guides don’t just point; they connect the sightline to what you learned at Imjingak and Mangbaedan, and they explain why those specific locations matter.
If you want photos, plan your time so you’re not scrambling at the end. Dora is timed, and you’ll appreciate getting a few calm moments rather than racing.
Stop 5: Gamaksan Chulleong Bridge and the Hill That Comes With It
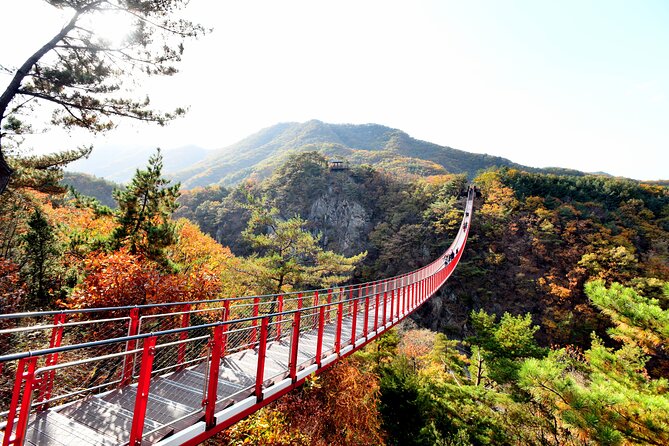
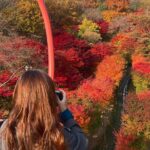
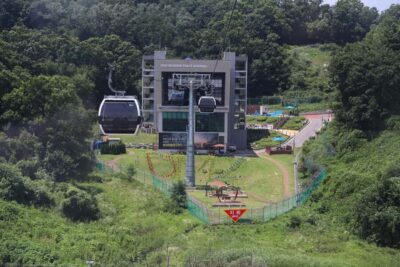
Your final major stop is Gamaksan Chulleong Bridge, a suspension bridge in the Solma-ri area. The bridge itself is about 150 meters long and 1.5 meters wide—so it’s narrow. The setting matters too: the area is tied to the Battle of Solma-ri, also called the Battle of Gloster Hill, in 1951.
You’ll have about 1 hour at this stop, and admission is free. The bridge is scenic, but the emotional payoff often comes from understanding the wartime story behind the terrain. In this region’s Korean War context, it’s also linked to a heroic battle involving British troops, which gives the view more weight than a typical bridge photo stop.
Now the practical part: this bridge usually includes a climb to reach the viewpoint. One account described roughly 400 steps from the road to the hill where the bridge starts. If you’re already tired from the tunnel, that uphill push can feel steep.
Here’s how to make it easier on yourself:
- Wear secure, supportive shoes (closed-toe is best).
- Keep a steady pace; don’t sprint the steps.
- Bring your water/snacks strategy, since meals aren’t included.
Once you’re on the bridge, the time is worth it. The width and suspension sway make you pay attention to where you place your feet, and that focus can make it feel more real than a quick viewpoint.
Price and Value: Why $45 Can Actually Be a Good Deal
At $45 per person for an 8-hour DMZ day, this tour can be strong value—mainly because several key parts are included. You get:
- Air-conditioned vehicle
- Admission tickets for the major paid stops (Third Tunnel and Dora Observatory)
- A professional guide
- A plan that covers multiple DMZ-adjacent sites in one day
What’s not included is also clear: meals and beverages, travel insurance, and the Joint Security Area (JSA). Hotel pickup/drop-off is also not included. In other words, you’re paying for the core sights and the guiding. If you were hoping for a full menu experience or JSA access, you’ll need to adjust expectations.
For many first-timers, the biggest value comes from pairing the tunnel (physical realism) with Dora (visual connection) and then wrapping it up with Imjingak and Mangbaedan (human context). That blend is what makes the day feel complete instead of random.
Guides Matter: What Makes This Tour Feel Smooth
The guides are a major reason this itinerary scores high. Different names come up often—people like Stella, Mama Winnie, Leo, Grace, Kenny, and Thomas—and the pattern is consistent: they explain what you’re seeing clearly and keep the group moving on schedule.
You’ll also benefit from guides who help with the vibe, not only the facts. One guide style I’ve seen highlighted is keeping a respectful tone while still making the day engaging. Another common perk is extra effort with photos—some guides help take individual and group shots rather than leaving you to fend for yourself.
On the bus ride, some guides use interactive materials like photos or videos so the DMZ stops don’t feel like disconnected stops. It’s a small thing, but it changes how quickly your brain builds a map of the day.
And if you’re someone who gets overwhelmed by complex history, a good guide acts like a translator: turning a long list of events into a coherent story you can follow.
Practical Tips So You Don’t Feel Miserable
This tour has a “moderate fitness” note for a reason. The walking and stairs involved in reaching the bridge plus the tunnel descent/ascent mean you should be comfortable with active sightseeing.
A few practical things that matter:
- Bring a current valid passport (it’s required on the day of travel).
- Wear shoes you can walk in for a long day. The tour recommends you refrain from flip-flops, slippers, or high heels.
- Don’t count on meals being provided. It’s smart to bring snacks and drinks.
- Keep your expectations flexible: the DMZ visit can be affected by military operations and timing.
Also, this itinerary doesn’t stop at big shopping-style detours like ginseng or amethyst factories. That’s a plus if you want the day to stay focused on the real sites.
If the weather is bad, Dora Observatory might not deliver the same crisp view you hoped for. The suspension bridge and tunnel still happen, but your sky will be what it is—so dress for changes and keep a calm plan.
Should You Book This DMZ Tour?
Book it if you want a DMZ day that’s not just a quick photo stop. The best reason to choose it is the combination: Imjingak + Mangbaedan for the human memory, the Third Tunnel for physical reality, Dora Observatory for northward sightlines, and Gamaksan Chulleong Bridge for a final, emotionally charged view tied to wartime ground.
Skip it or think twice if you:
- Don’t do well with cramped spaces or low ceilings.
- Struggle with steep uphill walking after already doing the tunnel.
- Specifically want the JSA, because this tour does not include it.
If you’re fit enough for a challenging day and you’d rather learn through real landmarks than through a lecture, this is a solid value option at $45—especially given that the itinerary includes multiple admissions and a guide in one package.
FAQ
Is Joint Security Area (JSA) included?
No. The tour explicitly notes that the Joint Security Area (JSA) is not included.
How long is the DMZ tour?
The duration is listed as approximately 8 hours.
What’s included in the price?
The tour includes an air-conditioned vehicle, admission tickets, and a professional tour guide. Meals and beverages are not included.
Where do I meet the group?
The start point is Myeong-dong subway station. The tour returns to the same area at the end (Myeong-dong, Jung District).
What documents and items should I bring?
A current valid passport is required on the day of travel. It’s also recommended to bring some snacks & drinks, and to wear shoes suitable for walking (avoid flip-flops, slippers, and high heels).
Can I cancel for a full refund?
Yes, you can cancel for free up to 24 hours in advance of the experience start time for a full refund. If you cancel less than 24 hours before, the amount paid will not be refunded. The tour can also be canceled without prior notice due to military operations.
More Tours in Seoul
- Best DMZ Tour Korea from Seoul (Red Suspension Bridge Optional)★ 5.0 · 41,422 reviews
- DMZ Tour: 3rd Tunnel, Option(Suspension Bridge, Boat) from Seoul★ 5.0 · 21,373 reviews
- DMZ tour south Korea from Seoul (NK experience hall, defector)★ 5.0 · 20,599 reviews
- Seoul: DMZ Tour with Optional Suspension Bridge★ 4.8 · 5,277 reviews
- Seoul: DMZ The 3rd Tunnel and Suspension Bridge Tour★ 5.0 · 4,656 reviews
More Tour Reviews in Seoul
- Best DMZ Tour Korea from Seoul (Red Suspension Bridge Optional)★ 5.0 · 41,422 reviews
- DMZ Tour: 3rd Tunnel, Option(Suspension Bridge, Boat) from Seoul★ 5.0 · 21,373 reviews
- DMZ tour south Korea from Seoul (NK experience hall, defector)★ 5.0 · 20,599 reviews
- Seoul: DMZ Tour with Optional Suspension Bridge★ 4.8 · 5,277 reviews
- Seoul: DMZ The 3rd Tunnel and Suspension Bridge Tour★ 5.0 · 4,656 reviews
The DMZ & the Border, More Routes
- Best DMZ Tour Korea from Seoul (Red Suspension Bridge Optional)★ 5.0 · 41,422 reviews
- DMZ Tour: 3rd Tunnel, Option(Suspension Bridge, Boat) from Seoul★ 5.0 · 21,373 reviews
- DMZ tour south Korea from Seoul (NK experience hall, defector)★ 5.0 · 20,599 reviews
- Seoul: DMZ Tour with Optional Suspension Bridge★ 4.8 · 5,277 reviews
- Seoul: DMZ The 3rd Tunnel and Suspension Bridge Tour★ 5.0 · 4,656 reviews
Just added to Exploring Seoul


DMZ Day Tours, compared.
 ★ 5.0DMZ Tour: 3rd Tunnel, Option(Suspension Bridge, Boat) from SeoulFrom $3521,373 reviews
 ★ 5.0DMZ tour south Korea from Seoul (NK experience hall, defector)From $2620,599 reviews
 ★ 4.8DMZ Tour with Optional Suspension BridgeFrom $455,277 reviews
 ★ 5.0DMZ The 3rd Tunnel and Suspension Bridge TourFrom $654,656 reviews
 ★ 5.0Signature DMZ Tour: Exclusive Defector Talk & Suspension BridgeFrom $274,459 reviews
 ★ 5.0Thrilling Korean DMZ 3rd Tunnel Tour from Seoul + Red Bridge RushFrom $353,097 reviews
 ★ 4.9DMZ Tour & Suspension Bridge (Option English/Spanish)From $352,628 reviews
 ★ 5.0DMZ Past and Present: Korean Demilitarized Zone Tour from SeoulFrom $372,481 reviews
Browse the lists this tour appears in